People can tell me how they run their classroom all day long and I do love to hear about it because I am a person who LOVES to try new things. I like to throw EVERYTHING at the art teacherin' wall just to see what sticks. But what REALLY helps me is seeing it in action. Sure I can imagine what Call and Response or a behavior management plan my look like but it's so much better to see it happening. So...that's why I love to share what it looks like in my art room. For that reason, I'll be sharing my first day teaching kindergarten right here!
If this video looks a little familiar that's because...I have been running my first day of kindergarten the very same way FOR YEARS. If it works, stick with it, right? And I'll be adding links to more blog posts with videos here.
This blog post breaks down the lesson and why I teach certain routines on that first day.
Wowza, y'all. School began last week for me with days of professional development and just yesterday for my students and all I can say is that in my 22 years of teaching, I've never had a year like this! And...it's only Tuesday.
Just to give you a little info on what my school district is doing for our elementary students: kindergarten thru second grade have the choice of going virtually or returning in the classroom. If they are returning, they are to be wearing masked, spaced 6' apart and washing or sanitizing hands frequently. My older students in third and fourth grade have the option of being remote or virtual. Remote means that, when allowed, they will be back in the building. My district plans to reassess in two weeks. However, we do have some of our third and fourth graders at school as they may be the children of teachers or learners who need to be with teachers. So, what that means is that every 3rd and 4th grade teacher has about 3-4 children in her classroom and is asked to teach them and her remote learners simultaneously via Zoom. Which is...a lot.
As for me, I've been asked to prep lessons for all the virtual and remote learners as well as teach my in house students. Because of some schedule overlap, I have not been going live with my remote learners. Instead, I've been providing them with prerecorded videos for them to listen and create at their own pace.
All that to say...it's been a rollercoaster so far and that was BEFORE the kids even got here. I had to much prep to do for those remote and virtual learners that I nearly neglected my in person kiddos. However, on Sunday, I came in, finished setting up my art room (new room tour to come) and recreated my Rules and Routines video. I was able to salvage the first have of the video (originally recorded in 2017) but had to completely redo the second half as we have new routines to follow.
Here you go!
On our first day, here is what we do:
* I meet them in the hallway. If you know me, you know that I use the acronym WELCOME on the first day.
Normally, my students would go straight to the floor and be seated...you can see my USUAL first day routine here. However, this year, we had to do two new things: get our hands immediately sanitized as I demonstrate in the video and go stand on a spot that is 6' apart. In future art classes, we'll go straight to our seats but on that first day, we wait a pinch while we all sanitize and enter the art room.
* I got everyone quickly to a seat. The tables are color coded by messy mats (not sure if they will stay but they are working for now). I also have color coded circle stickers on the back of each chair that has the table color and number on it. My friend Andrew @elementaryarts recommended them to me and I found them on Amazon.
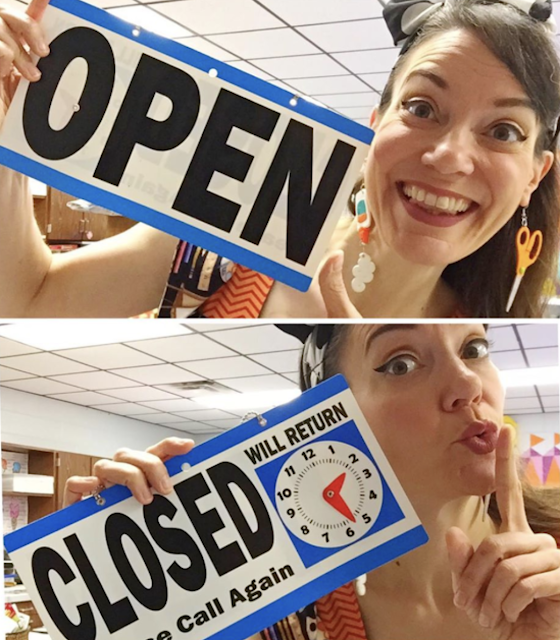
* Once seated, I do my greeting. * We learn our Art Class Catchphrase. * I introduce the Word of the Day. * We talk about the Open/Closed sign. * We talk about the Happy/Sad board.
I did it just like you see in this video...except students were at their tables:
* From there, we watch the video I shared at the top of this blog post.
* We stretch! * We greet each other and I ask a list of silly questions (more on that in an upcoming blog post!). This you can also see in the video from last year. * We review the clean up routine with drums, gong and a table caller. * We learn the lining up routine...and that's it!
And that...was our first day. I LOVE the idea of doing art in art class on the first day but with 30 minutes and so many new things...this was all I could pack in. I'll share with you what we do on the second day...and I'll continue to share with you as I learn new things about this new art teacherin' world we find ourselves in. Sending y'all hugs. We've got this!
BIG NEWS! My podcast is now available on Apple Podcasts! I'm so excited. If you want to keep up with me, be sure and subscribe. Also, a rating and a review would be super duper. Thank you, friends! I have been talking A LOT here lately, both here and on my podcast, about heading back to school. It's right around the corner for me (next week, ACK!) so it's all I've been thinking (and nightmaring) about. In case you've missed it, I've been sharing about my rules and routines for my art room. Next week, I'll be talking about the three consequences I use in my art room, why students might misbehave in our room and the one classroom management tool I use like crazy. But today...I thought I'd share my very favorite art projects to do on the very first day (follow this link for videos and more)! FULL DISCLOSURE: I try VERY HARD on those first days to do the SAME project with ALL of my grade level kids. Why? For my sanity, y'all! I gotta work up that stamina again. AND because my focus is rules and routines. Doing the same and simple lesson with my students allows me to focus on the rules and routines...while they are creating. So what I'm sharing with you here today are projects that can be done with 1st-4th (and sometimes kindergarten too but I usually start here for them). The exception to this is when I've done Dot Day projects at the start of the year, where each grade does something different. You can find my fave Dot Day lessons below.
Last year, this lesson I created was a HUGE hit, both with my students and fellow art teachers. I know the link for the sheets has been broken forever but GUESS WHO FIXED IT! That's right...finally. Follow this link for both FREE downloadable PDFs. You and your kids will love this first day activity!
Who's to say kids can't paint in art class on the very first day?! I created these Welcome Back banners for my students to paint at the END of last year...so I could hang next week. But you could make them now, let the kids paint them and hang them up for Open House or just to brighten the halls. More details on how these were created here and here (with video!).
I'm a big fan of having my students create collaborative pieces at the start of the school year. Why? Because they can help establish a culture of community! And they are so pretty. We created this piece a couple of years ago and it was so well received that we have since painted a bunch more for our school library. More details here and here!
Of course, you cannot go wrong starting off your school year with The Dot by Peter H. Reynolds. I have done a BAZILLION different Dot Day projects, many complete with instructional video. I put 'em all into one big blog post right here. So, need some Dot Day? I got you covered!
This here is an oldie that I've brought back a couple of times now...three times to be exact! I've created a popular video that you are welcome to share in your art room. You can find the lesson details and video here.
And this big ole beast, inspired by the author Todd Parr, makes me so happy that I've yet to take it down!
There are truly so many ways to start your school year...but I would encourage you to START SIMPLE. I know these projects may not seem to be simple. That's because you are just seeing the final results. On that first day, it should be RULES AND ROUTINE city, okay? With some creating mixed in. If you do the same lesson with everyone, then you are making your life a little easier. And when your life is a little easier, then you can focus on rules, routines and getting to know your kiddos (my favorite part). So find what works, have fun, enjoy those first few days by keeping your life easy. Remember, a happy person makes for a happy art teacher. Go easy on yourself and have a wonderful start to your school year. More details on these trees here!
Remembering all of the routines I wish to cover on the very first days of art was always tough for me...especially in 30 minutes! So a while back, I created this acronym that makes sure I say it all without forgetting a thing. I created this into a downloadable pdf for you right here! In this week's podcast episode, I'll be sharing the story of my very first day teaching art. Spoiler Alert: it was a HUGE epic disaster! I thought rules were the only thing you covered on the very first day and, well, you'll just have to take a listen:
Last week, I got my room (mostly) set up and ready to go. I filmed a tour and will share later this week! But for now, you can sneak art room peaks here or on my Instagram!
When I give my art room tour, I'll be sharing links to where to scoop up some of these items...but most of what you see here was made by me!
And the tutorials for what I've made can be found right here on my blog. If you just cannot wait for an art room tour, here is a peek at last year's:
But back to my routines...I have chatted about W.E.L.C.O.M.E. here...
In fact, I've got a ton of blog posts all about how I have run my first day(s) of art. I'll be chatting about this a lot more here and on my podcast so be sure to subscribe! Here are a bazillion links to videos and blog posts about my W.E.L.C.O.M.E. and my first days of school! A Glimpse into My First Day, 2018-19
Ohhhh-whey! Don't mind me, it's just the second Monday of the new school year and I've already got my feet up and I'm surrounded by Getting to Know You Sculptures. Last week, I shared with you a video where I talked you thru what I do my first day with my 1st and 2nd graders for their first 30 minutes. Today I thought I'd share with you a video of myself with my kiddos to give you more of a visual. So, here you go! My very first art class with some of my very favorite people:
Now, if you need more explaining about my very first 30 minutes and why I do what I do, you can check out this lil clip:
I love seeing how other art teachers teach. I am loud, annoying and definitely not for everyone...but that's me. That's who I am and that's how I teach. I really think finding your voice in your classroom is the best way to be your best teacher. So while I like to share what works for me, it's by no means me saying that you should do it too. It's just an offering of ideas and a little peak inside. Y'all are always welcome to my art room! So pull up a chair, roll up your sleeves and...GO CLEAN SOMETHING for heaven's sake. This place is a PIT! All kidding aside...stay tuned...I've got more videos coming your way this week and a follow up to our sculpture lesson. Love y'all!
Well, all this week I've been experiencing my first day of art over and over and over. All y'all know what I'm talking about...with 20 classes, you have the joy of hearing yourself say the same things on loop. Most of my classes, kindergarten through 2nd, are 30 minutes in length. I thought I'd share today what I do in that very first 30 minute art class...and stay tuned. I'll be sharing my second day of art (and what I do with my hour long classes) later on this week. For now, here you go!
The video I play on that very first day of art is one I created last year. My art room looks SO DIFFERENT NOW! It's kinda crazy to see how much I changed and redid last year. My students LOVE this video and it's such a great reminder of what is expected of them. Here it is:
Creating videos is a great way to share with kids important information without putting yourself on repeat. My students love to see the adults in the building cutting up and misbehaving in this video!
I've been using a variation of this "cheat sheet" for years...and it really helps. I call it my security blanket. I'm sharing it with you in case you need a lil bit of security!
Here are the random and sometimes off the wall questions I ask the students. These questions are all over the place...which really holds their attention and keeps them on their toes.
Much more to come on how I do my first days...but I did want to share with you what I cover on that very first day when I have 30 minutes or less. Happy New School Year!
Howdy, bookworms! I hope everyone's summer has been a relaxing and rejuvenating one so far. It's in this chilled-out state that I thought it might be fun (heavy on the "might") to begin chatting about the upcoming new school year and how we might improve on our art teacherin' awesomeness. One book that I think will really help us and our students is The Growth Mindset Coach by Annie Brock and Heather Hundley.
As some of you know, I do a Facebook LIVE chat right here every Wednesday night at 8pm CST. I did take the month of June "off" as I was traveling and teaching quite a bit. I've so missed chatting with my Wednesday night art teacherin' crew so I'm excited to "see" y'all this evening. In previous chats, we've needle felted, worked in clay, brainstormed, shared nearly every idea under the art teacherin' sun. You can find all of our past chats archived here. When I threw the idea of a book club out there, many enthusiastically agreed. I chose this book because it's one I started midway through the school year and really enjoyed...but one I also felt like I needed to discuss with other art teachers. How can I make this work in my art room? What have other art teachers done? How can we empower our students together?
Tonight I thought we could tackle just a few of those thoughts. This book club is not limited to just art teachers. You don't have to have read the book to join. Feel free to join the fun, no pressure. We'll be happy that you joined, regardless! Also, if you join the fun tonight, I've got TWO BIG ANNOUNCEMENTS about this book to share!
I have read the Intro as well as chapters on August and September. I'm excited to discuss the difference the following: * Fixed vs. Growth Mindset: Where do you fall? * Growth Mindset in the Art Room: What does this look like? * Practice and Persistence is a Path to Achievement: We got this! * Introducing Growth Mindset on the First Days of Art See y'all tonight!
How you start your art class sets the tone for your art teacherin' day. Lemme chat with y'all about what I have found to be the most successful ways to start art off right. A Greeting: Okay. Y'all know that if you let them, your kids will walk into your art room saying the following: I like your hair; I like your shoes; I lost my tooth; My grandma is visiting; It's my birthday!; Yesterday was my birthday!; (and, my personal fave) WHAT ARE WE DOING TODAY?! I like to divert this practice of holding 20 individual conversations by starting the class with a greeting. 'Hello, my most amazing artists!' is my favorite. It works for me and it eliminates the chance of me getting sucked into long winded chats. A Minute to Prep: I like to give myself a minute to grab the supplies I'll need for a lesson. Sometimes that means I'll have a "teacher" sit in my chair and chat with the kids about art. Another way I like to do that is with a short video created either by me or found online. This gives all my students a chance to settle in quietly. Tape on the Floor: The tape on the floor is a gift sent from art teacherin' heaven. I don't have a carpet (I'm not a fan of 'em even though they are pretty) so the kids don't know where to sit. Tape helps guide them in quickly to take a seat. Happy/Sad Board: Y'all, I'm the worst about being consistent but my happy/sad board is something I can handle...and I'll often have the kids handle it! I talk about it in my very first Art Teacherin' 101:
These little things like a greeting, a minute to catch my breath by having a "substitute teacher" in my chair, tape on the floor and the Happy/Sad board make a big difference when it comes to starting my art class off right. What do y'all do at the start of art to set the tone? Oh! And I did mention the Smartest Artist, more details here.
Last week, I discovered a little magical device that worked wonders with a chatty fourth grade class: this wee plastic sign from the Dollah-Make-You-Hollah Tree! So, just how does it work? In short, I start off by placing it on the table of the hardest working group. Then I set my timer for seven minutes (because five minutes broke the class up too much) and when the timer went off, the Rock Star group chatted about who was the next set of Rock Stars. The wee sign was then passed to that table and Wash, Rinse, Repeat. Allow me to do a slightly better job explaining it to you here:
I'm REALLY BIG into putting the kids in charge of stuff like the Happy/Sad board (see below-below), the clean up signal, and, now, this. I could tell a big fat hairy fib and say that it's because I like putting ownership in the kids hands or instilling responsibility. I suppose that's a super sweet side effect but the fur realz reason is that 1. I'm Lazy and 2. I'm Crazy. I'd forget ALL of that stuff each and every art class if the kids weren't so stinkin' good at reminding me and keeping up with all of it. So there. Now you know the truth.
In case you missed my Dollar Tree shopping spree finds, here you go! It truly is Art Teacherin' heaven, y'all.
And in case you missed that bit about the happy/sad board...dudes. I love this thing. It's quick, it's easy and it's a visual for the kids. It's also great for when I have a sub as he/she can keep up with it as well. In my sub videos, you'll often see me chat about it as a reminder to the kids that I am watching. ALWAYS WATCHING...(something on Netflix).
Because I did a lousy job explaining my table set up, here it 'tis. With my bigger glasses, we use every seat in the house except those end cap seats. That's where I like to plop down and check out the happenings.
Now to figure out what to do with the rest of the little signs. I have a feeling this idea is going to progress so stay tuned. Love to hear your tips and tricks for management in the art room. We can all learn from each other!
My very first art teacherin' gig was in Nashville over 15 years ago. I was hired the weekend before school started and I was COMPLETELY CLUELESS. I had absolutely no idea where to begin when I was given the keys to my portable. The only evidence of art teacherin' that I could find was a sad stack of curriculums (shudder), worn SchoolArts Magazines (which I poured over) and a coffee can of broken crayons. I must have turned around and around in that little space a dozen times trying to figure out just where to begin. I stayed up until 3am creating the most beautiful Vincent van Gogh rules posters thinking that the rest would take care of itself. Um. It did not.
If I had known then what I know now, I woulda said that getting ORGANIZED is the most important way to start your art teacherin' life. I don't mean getting that storage closet all tidy or having every bottle of paint in a perfect row, that's all surface stuff that can be whittled away over time. I'm talking about getting the important parts organized: your class lists, your schedule, your lessons and your yearly plan. Once you have that squared away, you'll be able to breathe so much easier and will have a more enjoyable time getting the rest in order.
Organize Your Day-to-Day: I recycle the same stinkin' 5 folders each year. My schedule changes every day. For my sanity, I print out a copy of each day's events and tape it to the front of each folder. Inside the folder is a class list of who I'll see that day as well as my seating charts. I pull this out each day, sometimes placing a sticky note of some topics I need to touch on with each class on the front. This works fabulously for those days I'm out sick as well as it makes my sub's life so much easier. Organize Your Student's Art Work: I keep those bins that I shared in the clip handy to organize student work. One thing I failed to mention in the video is that I have my tables organized by color, for example: red table, orange, etc (the video below gives you a room view). I have a folder for each table. At the start of art class, I'll hand a student who sits at that table the folder which they then take back to their seats. From there, they pass out the artwork to their table mates. At the end of class, they collect artwork, return to the folder and put back in the bin.
Organize Your Teaching Life: It's more than just lesson planning, y'all. What I love about my friend Laura's planner is that it covers EVERYTHING. There are lesson plans, a calendar, a day-to-day planner, a monthly agenda, To-Do Lists, like, everything. Because your teaching life is not just lessons. It's knowing what is going on in the seasons, throughout the school, in other areas of curricula. Having all of these things organized in one binder will really save your sanity. Lemme show you how I use mine:
My school calendar has less items on it than my personal one...although, at school, I do have them open side-by-side. I love how big that calendar is so that I can really scrawl my notes all over it.
Because I use Laura's template's to write out my lesson plans, what I write on my weekly teaching schedule is an abbreviated version. What I really find to be important is documenting what happened during a particular art class. This helps me to know how to better approach the class the next time I see them. For example, if one class needs to rework their self-portraits or needs a vocabulary review, I like to write that down while it's fresh on my mind. Otherwise, as you know, goes right outta our crazy lil heads.
Organize Your Personal Life: I'm telling you, I am The Keeper of the Notebooks. I used to have a notebook that held EVERYTHING from school stuff, personal goals, sketches, art, you name it, this bulging lil book held it. Those kind of books always wore me out because it held TOO much information. So I switched to a notebook for each of my different interests: sewing, drawing, ideas for school, ideas for crafts, etc. My purse became a pull-behind suitcase to cart around my library of books. When I discovered that wee 3-ring bound book at Target it was like the heavens opened up and the angels sang. I bought the tabs, the folders, the calendar and everything that went along with the binder. It's small enough to throw in my big ole purse but big enough to hold my thoughts. I can't recommend y'all get one enough!
Once you've got your art teaching ducks in a row THEN you can indulge in the icing on the cake: the decorating! Here's the tour of the art room I have shared with my students this week. Like I said, seeing other teacher's rooms can be so intimidating. But all that decorating comes with time. Be easy on yourself, take your time, be thoughtful as you plan and just know that these things will happen.